Pancakes in a cast iron skillet fail for one reason almost nobody explains: the pan keeps getting hotter while you cook. The burner setting that produced a perfect batch one produces a scorched-outside, raw-inside batch three, because cast iron stores heat faster than thin batter pulls it out. This guide covers the surface window that actually works (350 to 375°F), two ways to know you’re in it, why the first pancake fails for everyone, the sticking diagnosis, and the dutch baby. The fix for most cast iron pancake problems is the opposite of instinct: turn the heat down.
Who this is for
You own a cast iron skillet and your pancakes either stick, burn, or both. Maybe the first one shredded when you tried to flip it. Maybe batch one was perfect and batch three came out bitter and dark while still raw at the center, and you concluded the pan runs hot, or your batter is wrong, or cast iron just isn’t for pancakes. None of those is the problem. The problem is that nobody told you how heat actually moves through five pounds of iron over a 20-minute pancake session, and every instinct you have about adjusting it is backwards.
TL;DR: the five rules
- Preheat low and slow: 5 to 10 minutes on medium-low. Not 2 minutes on medium-high. The goal is an evenly hot pan, not a quickly hot one.
- Verify before the first pour. Water drops should sizzle hard and bead across the surface (about 350 to 375°F). An infrared thermometer ends the guessing entirely.
- Use a thin film of fat, refreshed lightly every batch or two. Neutral oil beats whole butter at these temperatures.
- Flip on the bubble cue. Bubbles pop and stay open across the surface and the edges look dry. Flip once.
- Turn the heat down between batches, not up. Cast iron accumulates heat for the whole session. The dial that was right for batch one is too high for batch three.
That’s the method. The rest of this guide is why each rule works, which means you’ll be able to fix things when a stove, a pan, or a batter changes the variables.
Why cast iron pancakes fail (the heat-retention problem)
Cast iron holds roughly 1.7 to 2 times the thermal mass per square inch of a comparable stainless pan. That stored energy is why it’s the best pan in the house for searing a thick steak: a cold ribeye barely dents its temperature. We walked through those numbers in the stainless comparison, and they have a direct consequence for breakfast.
A quarter cup of pancake batter is not a ribeye. It’s thin, light, and mostly water, and it pulls almost no heat out of the pan. Meanwhile the burner underneath keeps feeding energy in at the same rate. Pull less heat out than the burner puts in and the surface temperature climbs, batch after batch. The setting that held a perfect 360°F for the first pour is producing a 420°F surface fifteen minutes later, and at that temperature the outside of a pancake scorches before the inside sets.
The second half of the trap: cast iron responds slowly. Turn the dial down and the pan stays effectively at its old temperature for two to three minutes, coasting on stored heat. So the cook who notices batch three burning, turns the burner down, sees no immediate change, and turns it back up has just guaranteed batch four burns worse. You have to adjust early, before the pan tells you it’s necessary, because the pan’s feedback arrives minutes late.
This is the single insight that separates good cast iron pancakes from frustrating ones, and it’s why every rule below points the same direction: long gentle preheat in, gradual heat reduction out.
The right temperature for cast iron pancakes (and two ways to know you’re there)
The target is a cooking surface between 350 and 375°F. That’s the range King Arthur Baking’s griddle guide identifies as ideal for pancakes, and it’s where the batter’s sugars and proteins brown into an even gold face in two to three minutes while the center cooks through. Below about 325°F you get pale, dry pancakes that take forever; past 400°F the face scorches in patches before the bubbles ever arrive.
Note what that target is: a surface temperature, not a dial position. “Set the burner to 5” advice is worthless across stoves; the same dial number runs 100°F apart on different ranges, and glass-top elements cycle on and off in ways gas doesn’t. Measure the surface, not the knob. Two ways to do it:
The infrared thermometer (the precise way). Point it at the center of the pan, then at a spot near the rim. You want the center in the window and the rim within about 25°F of it. An IR thermometer costs about $20, and King Arthur’s griddle piece endorses exactly this tool for reading a cooking surface. If you own one, the water test below is obsolete.
The water drop test (the no-tools way). Flick a few drops of water onto the dry surface and read the behavior:
- Drops sit and steam lazily: under roughly 300°F. Keep preheating.
- Drops sizzle hard, bead up, and are gone in a second or two: you’re in the window. Pour.
- Drops instantly ball up and skitter around like marbles: the Leidenfrost effect, which kicks in right around 380°F on a metal pan. You’re at or past the top of the window. Take the pan off the heat for a minute and turn the dial down.
The folklore version of this test (“when the drops dance, it’s ready”) actually marks the ceiling, not the sweet spot. Dancing drops mean you’re about to be too hot. Hard sizzle is the green light.
For the dial itself: medium-low with a long preheat lands most stoves in the window. Lodge’s own classic pancake recipe preheats over medium heat, which works too; medium just reaches the window faster and overshoots it more easily, so it demands the water test and an earlier turn-down. Slower is more forgiving.
Why the first pancake always fails (and how to fix it)
The sacrificial first pancake is so universal it’s treated as a law of breakfast. It isn’t. It’s a symptom of a pan that wasn’t ready, and it has a mechanism.
After a short preheat, a cast iron pan is not one temperature. It’s a bullseye: a hot spot directly over the burner, sometimes 50°F or more above the rim, because iron conducts heat sideways slowly and the heat hasn’t had time to even out. Pour batter onto that bullseye and the center of the pancake burns while the outer edge, sitting on cooler metal, pales and sticks. Add fat that’s had no time to spread into the surface’s micro-texture and you get the classic first-pancake result: scorched middle, glued rim, shredded flip.
The fix is everything from the section above, executed patiently:
- Preheat 5 to 10 minutes on medium-low. The long duration is what lets conduction even out the bullseye. This is the same equilibrium logic as our eggs method, where 3 to 5 minutes is enough because eggs cook at a lower target; pancakes need a hotter, more even surface, so give it longer.
- Test the center and the edge. Water drops at both spots, or two IR readings. If the center sizzles and the edge steams, wait another two minutes.
- Swirl the fat. Add it after the preheat, never before, and tilt the pan so the film covers everywhere a pancake will sit.
- Let the batter lose its fridge chill while the pan heats. Cold batter drops the contact temperature on landing and slows the set; ten minutes on the counter while the pan preheats also lets the flour hydrate and the lumps relax.
Do those four things and pancake one comes out as well as pancake four. The “sacrifice pancake” is just the water test you didn’t run, paid for in batter.
How to cook pancakes in a cast iron skillet, step by step
The short version: preheat the skillet low and slow, 5 to 10 minutes over medium-low, until water drops sizzle hard and bead across the surface (about 350 to 375°F). Add a thin film of fat, pour the batter, and flip when bubbles pop across the surface and the edges look dry. Between batches, turn the heat down, not up.
Step 1: preheat low and slow
Set the dry pan over medium-low and leave it for 5 to 10 minutes. No oil yet; oil sitting through a long preheat breaks down before the first pancake. Use the time to make the batter, or to let a fridge-made batter come toward room temperature. Any batter you like is fine, box mix included: this article is about the pan, and the pan does not care what the box says.
Step 2: the water drop test
Flick water on the surface, center and edge. Hard sizzle and beading at both spots is the green light. Lazy steam means wait; instant marble-skitter means you’ve overshot, so lift the pan off the burner for a minute and drop the dial a notch. Thirty seconds of testing here is the difference between a stack and a scrape.
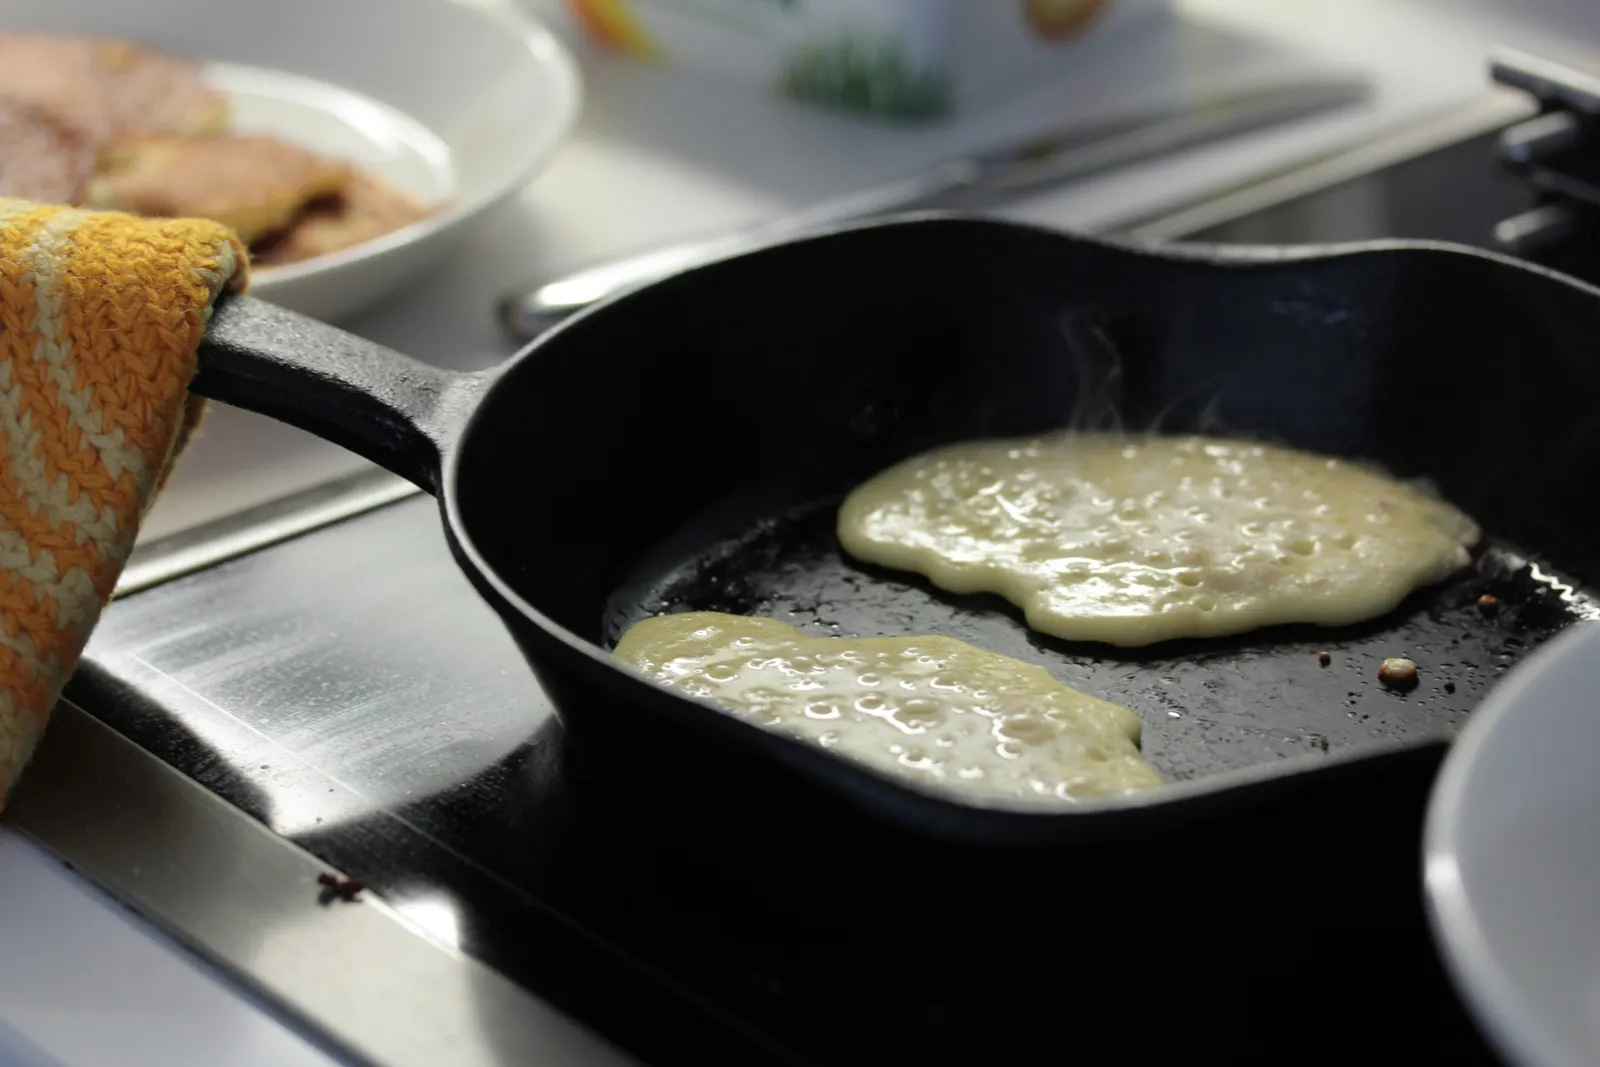
Step 3: fat, batter, bubbles, flip
Add about a teaspoon of neutral oil and spread it with a folded paper towel into a thin, even film. The old line cooks’ adage applies, and King Arthur Baking’s pancake tips quote it exactly: hot pan, cold oil, food won’t stick. The order matters; fat added to a ready pan stays slick instead of polymerizing away.
Pour about a quarter cup of batter per pancake. In a 10.25-inch skillet that’s two at a time with room to flip; the skillet size chart maps pancakes-per-batch for other pans. Then leave them alone.
Flip on the visual cue, not a timer: bubbles rise, pop, and the holes stay open across the face while the edges turn dull and dry. That’s the top structure setting. One flip, one only. The second side needs roughly half the time of the first; it’s browning a surface that’s already partly set, and the pan is hotter than when you poured.
Step 4: turn it down between batches
Here is the step that the entire first page of Google skips. After batch one or two, turn the burner down a notch. The pan has been banking heat the whole time, and thin batter does nothing to spend it. If a batch starts coloring faster than the last one, you’re already late: drop the dial and lift the pan off the burner for 30 to 60 seconds to shed the excess, then continue at the lower setting.
Wipe on a fresh whisper of oil every batch or two. Light is the operative word; King Arthur’s tips piece recommends the same light re-oil between rounds. A pool of fat doesn’t make pancakes more nonstick, it deep-fries their edges into greasy lace.
Why are my pancakes sticking to cast iron?
The top result on Google for this keyword is a Reddit thread with a shredded pancake and no good answer, so here is the diagnosis, in order of likelihood.
1. The pan wasn’t ready (most common by far). Batter that lands on a surface below the window doesn’t set a crust immediately. It flows into the microscopic texture of the seasoning and cooks slowly inside it, welding itself on. By the time the top bubbles, the bottom is anchored. If your pancake sticks and tears at the flip, this is almost always the cause, and the water drop test is the cure. Sticking is a temperature problem before it is anything else, the same rule we documented for eggs in cast iron.
2. The seasoning isn’t up to the job. A pan that’s gummy, patchy, or sticky to the touch before you even cook will grab batter no matter the temperature. If your pan drags a paper towel or feels tacky, run the sticky pan diagnosis first, and if the surface is genuinely thin or bare in spots, the seasoning method rebuilds it in an afternoon.
3. Wrong fat, or not enough. Cooking spray gums up cast iron, and a bone-dry “well-seasoned pans need no oil” approach is folklore. You need a thin but complete film, refreshed lightly as you go.
The hidden accelerant: cold batter. Fridge-cold batter knocks the contact temperature down at the exact moment the crust should be setting, which converts a marginal pan temperature into a sticking pan temperature. The Reddit thread’s own best answer flagged it. Counter rest while the pan preheats; that’s the whole fix.
If a pancake has already welded itself on: water in the still-warm pan, 90 seconds, then a wood or plastic scraper. The 60-second cleaning routine handles the syrup-and-butter aftermath; none of it requires re-seasoning.
Butter or oil for cast iron pancakes?
Oil for the pan, butter for the stack. That’s the answer; here’s the mechanism.
Whole butter is about 16 to 18 percent water and milk solids, and those solids start browning around 300°F and burn as the surface pushes through the 350 to 375°F pancake window. Batch one in butter tastes brown-buttery and looks handsome. By batch three the same butter’s solids are black specks distributed across every pancake face, and the flavor turns acrid. Butter also accelerates the overshoot problem: its burn point drops your margin for error exactly when the pan is creeping hotter.
A neutral oil (canola, grapeseed, vegetable) has no solids to burn and a smoke point of 400°F or higher, comfortably clear of the window; the oil smoke-point table has the full rundown. Clarified butter or ghee splits the difference, butter flavor with the milk solids removed and a smoke point well above the window.
So: thin film of neutral oil in the pan, cold butter melting on the hot finished stack. You get clean browning and full butter flavor, each where it belongs.
Cast iron vs nonstick for pancakes
Honest answer: nonstick is easier, cast iron is better, and the gap shows up in the browning.
Nonstick is forgiving in every way that matters to a beginner. No preheat discipline, no fat strategy, no sticking even from a cold start. If you make pancakes twice a year, use the nonstick and enjoy your morning.
Cast iron’s case is output quality at volume. The stored heat that causes the overshoot problem is also what produces an even, deep-gold face: the surface temperature doesn’t sag when batter lands, so the whole pancake browns at one rate instead of printing a pale center with a dark ring. And across a family-size session of five batches, the iron holds its window (with your help on the dial) where a light nonstick pan cycles with the burner. The same trade runs through cast iron vs carbon steel: responsiveness is the lighter pan’s virtue, stability is cast iron’s, and pancakes reward stability.
You do not need a special pan for any of this. A Lodge Classic 10.25-inch skillet at about $30 is the reference tool, and the buying guide covers when the smoother premium pans are worth it (for pancakes specifically: they aren’t; the batter never touches the casting texture once a crust sets).
The dutch baby: the giant oven pancake cast iron was made for
If you want one giant pancake instead of a stack, that dish exists, it’s called a dutch baby, and it skips the entire heat-management problem by moving to the oven.
A dutch baby batter is egg-heavy with no baking powder at all. King Arthur Baking’s dutch baby method runs a 425°F oven and notes that the eggs plus the hot skillet are what make it puff; steam does the lifting that leavener would. The cast iron part is structural: the skillet preheats in the oven, butter melts and foams in it, the batter hits that stored heat and the base sets instantly while the edges climb the walls.
The compact method: preheat the skillet in the oven at 425°F, melt 2 to 3 tablespoons of butter in it (butter is fine here, the batter pours in before the solids burn), pour in the batter, and bake about 20 minutes until the edges have puffed high above the rim and browned deeply. Pull it, watch it dramatically deflate (that’s correct, not a failure), and finish with lemon juice and powdered sugar. The custardy center and crisp cliff edges are the point.
It’s also the answer to a question people genuinely search: yes, this is the “giant cast iron pancake,” and it’s better than a griddled pancake the size of your pan, which cooks unevenly and flips never.
What to skip (the mistakes that ruin pancake morning)
- Turning the heat up when pancakes stick or come out pale. Pale pancakes from a sticking pan mean the surface wasn’t ready or fat coverage failed, not that the dial was low. Cranking it converts a sticking problem into a burning problem with the sticking intact.
- Trusting someone else’s dial number. “Medium-low” on your stove is not “medium-low” on the internet’s. The surface temperature is the spec; the dial is just how you chase it.
- Heavy re-greasing between every pancake. A thin wiped film, every batch or two. Pooled fat fries lacy, greasy edges.
- Fridge-cold batter straight into the pan. It chills the contact zone at the worst moment. Rest it on the counter during the preheat.
- Flipping early, flipping twice, or pressing the pancake. Wait for popped-open bubbles and dry edges, flip once, and never press; pressing squeezes out the steam that’s leavening the interior.
- Pouring batter onto an untested pan. The water test costs 10 seconds. The sacrifice pancake costs a pancake plus a cleanup.
Frequently asked questions
How do you keep pancakes from sticking to cast iron?
Preheat the dry pan 5 to 10 minutes on medium-low until water drops sizzle hard and bead across the surface, then add a thin film of neutral oil and pour. Don’t touch the pancake until bubbles pop open across the face and the edges look dry. Sticking is a pan-not-ready problem long before it’s a seasoning problem: batter that lands below temperature seeps into the surface texture and sets there.
What temperature do you cook pancakes on cast iron?
A 350 to 375°F surface temperature, per King Arthur Baking’s griddle guidance. Read it with an infrared thermometer, or use the water drop test: hard sizzle and beading means go, lazy steam means wait, instant marble-skittering means you’ve overshot the window. On most stoves that’s medium-low with a 5 to 10 minute preheat, turned down as the session goes on.
Why does the first pancake always fail?
The pan isn’t at thermal equilibrium: a short preheat leaves a hot spot over the burner and a cool rim, and the fat hasn’t spread evenly. The center of the pancake burns while the edge sticks. A 5 to 10 minute medium-low preheat, the water test at center and edge, and a fat swirl make the first pancake come out like the fourth.
Are pancakes better on cast iron or nonstick?
Nonstick is more forgiving, especially from a cold start, and it’s the right call for occasional pancake makers. Cast iron browns better (the stored heat holds the surface steady when batter lands, so the face colors evenly instead of pale-center-dark-ring) and stays in its temperature window across a big batch. The skill cost is real; the output is better.
Do you use butter or oil for pancakes on cast iron?
Neutral oil in the pan, butter on the finished stack. Butter’s milk solids start browning near 300°F and burn inside the pancake window, peppering later batches with black specks. Clarified butter or ghee works in the pan if you want butter flavor during the cook; the milk solids are removed and the smoke point sits well above the window.
Do you need to re-grease cast iron between pancakes?
Lightly, every batch or two: a wiped-on film, not a pour. King Arthur Baking recommends the same light re-oil between rounds. Pooled fat fries the pancake edges into greasy lace instead of browning the face, and it doesn’t reduce sticking on a properly heated pan.
Can you make a dutch baby in a cast iron skillet?
Yes, cast iron is the canonical dutch baby pan. Preheat the skillet in a 425°F oven, melt butter in it, pour in an egg-heavy batter with no leavener, and bake about 20 minutes until the edges puff far above the rim. The skillet’s stored heat sets the base instantly while egg and steam power the rise, and the deflate on exit is part of the dish.
Related reading
Pancakes are one station in the same heat-control curriculum the rest of the technique cluster teaches. Eggs in a cast iron skillet is the lower-temperature version of this exact discipline, and the steak guide is the high end, where the thermal mass that complicates your breakfast becomes the whole advantage. If your pan grabs batter even at the right temperature, the sticky pan guide and the seasoning method sort the surface out, the oil guide ranks the fats by smoke point, and the cleaning routine deals with the syrup.
The next time you make pancakes, you’ll preheat longer than feels necessary, test before you pour, and reach for the dial to turn it down right when the old you would have turned it up. That’s the entire skill, and it’s transferable: every food that’s ever burned or stuck in your cast iron was telling you the same thing about stored heat. Pancakes are just the cheapest place to learn it.