Most people who search “how to re-season a cast iron skillet” don’t need to re-season the whole thing. They need to diagnose what’s actually wrong with the pan they have, and four times out of five the fix is one fresh layer of oil baked on top of the existing seasoning, not a 12-hour strip to bare metal. This guide tells you which of five scenarios you’re in, then gives you the tuned procedure for each. The most common mistake in cast iron isn’t bad seasoning; it’s stripping a pan that only needed a touch-up.
Who this is for
You own a cast iron skillet that used to work and now doesn’t. Eggs stick that didn’t used to stick. The black coating is patchy, splotchy, peeling, gummy, or rust-spotted. You’ve read three different blogs that all say “strip and start over,” and that sounds like a Saturday-afternoon project you don’t want. You’re right to be skeptical. Most pans don’t need a strip.
TL;DR: the 5-minute diagnostic
- Splotchy color, but eggs still release: do nothing. Cosmetic only.
- Flaky or peeling in spots: scrape loose flakes off, then one fresh layer at 450°F for 1 hour. No stripping.
- Sticky or gummy surface: 500°F empty burn-off in the oven for 1 hour to harden the bad oil, then one fresh re-season layer.
- Rust spots: scrub with chainmail until the rust is gone, then one re-season cycle. See our rust removal guide for severity-graded methods.
- Fundamentally compromised (the whole surface is flaking, gummy after burn-off, or extensively rusted): strip to bare metal and run the full 3 to 4-cycle re-season.
That’s the framework. Everything below is the why, the strip methods, the bake procedure, and the mistakes to skip.
Why your seasoning failed in the first place
Seasoning is polymerized oil: oil heated past its smoke point chemically converts into a hard, plastic-like layer bonded to the iron. Serious Eats’ canonical cast iron care guide covers the same chemistry. The reaction needs three things to work: a thin layer of the right oil, sustained heat past the oil’s smoke point, and time (about an hour) for full conversion. When any of those three fail, you get a defective layer that will eventually fail.
The four common ways seasoning fails:
- Too thick a layer. Most common. Oil that puddles instead of forming a microfilm doesn’t polymerize uniformly. The center polymerizes; the outer ring stays half-polymerized and gummy, which is why you can have a pan that’s slick in the middle and tacky around the edges.
- Wrong oil. Olive oil’s smoke point (375°F) is below proper seasoning temperatures (450 to 500°F). Flaxseed oil polymerizes hard but in brittle layers that flake at the edges. The oil comparison article covers this in detail.
- Insufficient heat or time. A 425°F bake or a 30-minute bake creates partial polymers that look fine but flake under normal use.
- Cleaning damage. Aggressive scouring with steel wool can strip layers selectively; long water exposure rusts the iron underneath an intact-looking seasoning.
Knowing which failure mode caused the problem changes the fix. A too-thick layer wants a 500°F burn-off; a wrong-oil layer wants a strip. The diagnostic below sorts it out.
Diagnose: which type of re-seasoning do you need?
Here’s how to tell what your pan needs in under five minutes.
Splotchy or patchy (cosmetic only, do nothing)
The pan has lighter and darker areas, maybe some brown spots, but eggs and pancakes still release cleanly. No action needed. Splotchy color is just uneven seasoning thickness; it’s a cosmetic issue, not a function issue. Some of the most-loved cast iron pans on Reddit look terrible. Keep cooking; the layers will even out over time.
The mistake here is “fixing” a pan that doesn’t need fixing. Don’t.
Flaky or peeling (layer fix, one cycle)
The pan has bits of black coating coming up in flakes. You can see them in your eggs or scrape them off with a fingernail. The underlying seasoning is intact; one defective layer (almost always the most recent one) is failing.
Fix: scrape off the loose flakes with a metal spatula or chainmail scrubber, wash with soap and warm water, dry completely, then run one full re-season cycle (450°F, 1 hour, thin coat of grapeseed oil). Don’t strip; the underlying layers are fine.
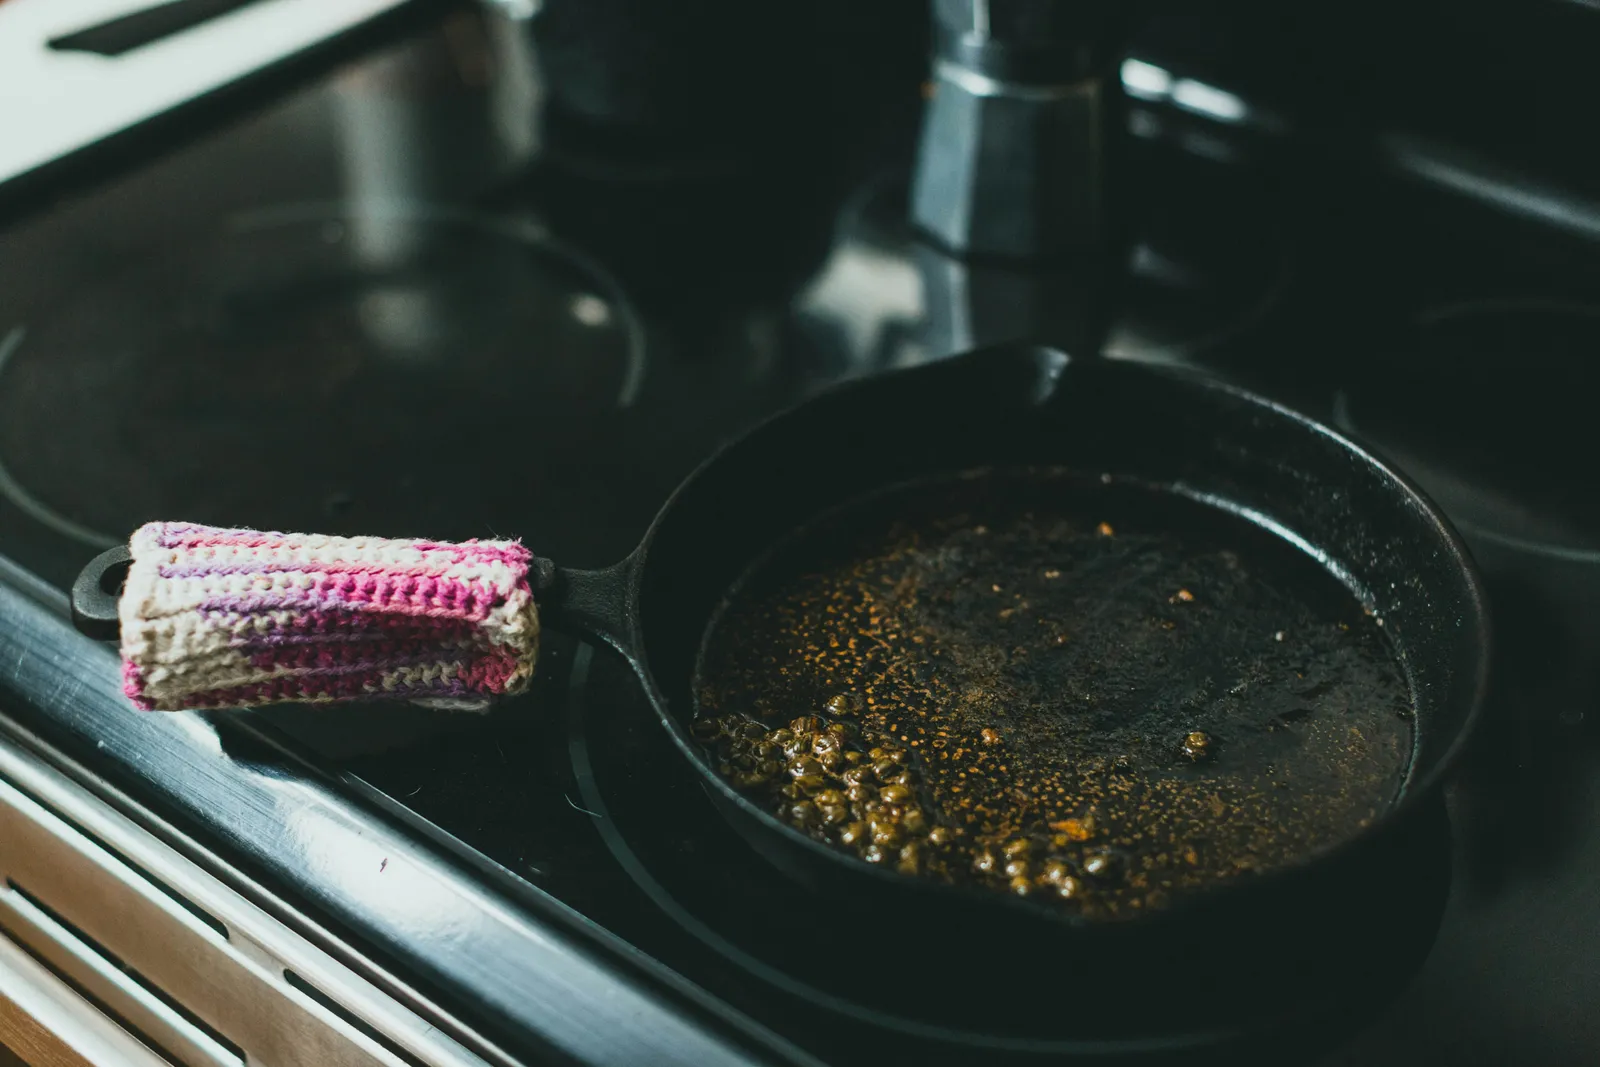
Sticky or gummy (over-oiled, burn it off)
The pan feels tacky to the touch even when clean and dry. Oil sits on the surface in visible smears instead of soaking in. This is the most common DIY-seasoning failure: too much oil in a previous attempt that never fully polymerized.
Fix: put the empty pan upside down in a cold oven, set the oven to 500°F, and let it run for 1 hour after reaching temperature. The high heat finishes polymerizing the gummy oil into a hard layer. Cool in the oven, then run one fresh re-season cycle on top.
Rust spots (cross-cluster fix)
Orange-red spots, either small patches or larger areas, anywhere on the pan. Surface rust is fixable in 20 minutes; deep rust is fixable in a few hours.
Fix: see our dedicated rust-removal guide for the severity-graded method (surface rust gets a chainmail scrub; pitted or extensive rust gets a vinegar bath or electrolysis). After rust removal, run one re-season cycle if the surface looks bare or 2 cycles if you went down to raw iron.
Fundamentally compromised (full strip needed)
You’ll know this scenario by the universality of the failure. The whole pan is flaking. The whole pan is gummy and stayed gummy after a 500°F burn-off. Rust covers more than 30% of the surface. You inherited a pan from a yard sale that’s clearly been through years of bad treatment. In all of these cases, the existing seasoning is more liability than asset; strip it and start over.
This is the only scenario where stripping is the right call. The strip methods are below.
How to strip a cast iron skillet to bare metal
Four methods, listed from easiest to most thorough. Pick based on what you have access to and how much patience you have.
Method 1: Self-clean cycle (1-3 hours, hands-off)
If your oven has a self-cleaning cycle, this is the fastest strip method. The oven runs at 800 to 900°F, which is well above the temperature any seasoning can survive. The carbon turns to ash; you wipe it off with a paper towel afterward.
- Put the pan upside down on a foil-lined rack in the oven.
- Run a full self-clean cycle (typically 2 to 3 hours).
- After the oven cools, the pan will be bare gray iron with white-gray ash residue. Wipe with a paper towel.
- Wash with soap and water (yes, soap; the soap myth is wrong), dry on the stovetop on low heat.
The catch: the oven needs to be sturdy, the pan needs to fit, and the wife/husband/roommate has to be okay with the smell. The high heat can warp older or budget pans (it’s rare with Lodge or any modern brand, more common with old/unknown vintage pans).
Method 2: Lye-based oven cleaner (24 hours, low effort)
The classic restoration method, low effort and no specialized equipment needed. Lye dissolves carbonized seasoning chemically.
- Put on rubber gloves and eye protection. Lye burns skin.
- Spray the pan generously with Easy-Off Heavy Duty Oven Cleaner (the sodium hydroxide / lye formula; check the label, not the fume-free version, which uses a different chemistry that doesn’t work as well for stripping).
- Put the pan in a heavy-duty trash bag, seal it, and leave it outside or in a garage for 24 hours.
- After 24 hours, scrub with a stiff brush and hot water; the seasoning will lift off in sheets. Repeat one more application if any seasoning remains.
- Neutralize any lye residue with a 50/50 vinegar-and-water rinse, then wash with soap and water.
This is the method most cast iron restoration communities recommend because it’s accessible and reliable. The trade-off is the chemical handling (do this outdoors or with good ventilation).
Method 3: Electrolysis (overnight, requires setup)
The serious restorer’s method. An electric current strips iron oxide from the pan via a chemical reaction in a sodium carbonate (washing soda) bath. Completely non-destructive to the underlying metal.
You need: a plastic bin, washing soda (Arm & Hammer, in the laundry aisle), a battery charger or DC power supply (10 to 12 amps), some sacrificial steel anodes (rebar works), and wire. Setup takes 30 minutes; the strip runs overnight.
This is the gold standard for restoring vintage Griswold or Wagner pans where preserving the iron surface matters. For a $30 Lodge that’s been compromised, it’s overkill. Method 2 (lye cleaner) is the right tier for most home cooks.
Method 4: Vinegar bath (4-8 hours, accessible)
The lowest-tech option. Fill the pan with a 50/50 mix of white vinegar and water; submerge if possible, or stand the pan up in a bigger container. Vinegar slowly dissolves the iron oxide and the bonded seasoning.
- Mix 50/50 white vinegar and water in a container large enough to fully submerge the pan.
- Submerge the pan for 4 to 8 hours, checking every 2 hours.
- The longer you leave it, the more bare iron you expose; do not leave a pan in a vinegar bath overnight unless you’re committed to a full strip and re-season, because the bath will eat into the iron itself after about 12 hours.
- Rinse thoroughly, scrub with a stiff brush, neutralize any acidity with a baking-soda-and-water rinse.
Use this when you don’t have lye cleaner and don’t want the smell of a self-clean cycle. It’s the slowest and most variable method; the lye is more reliable.
The actual re-seasoning bake (the same procedure, but tuned)
Once you’ve stripped (or determined you don’t need to strip), the re-seasoning bake is the same procedure as initial seasoning, but with a few tunings.
- Wash with hot soapy water and dry completely. Put the pan on the stovetop on low heat for 60 seconds to drive off any remaining moisture; water in micro-pores of the iron under a new oil layer is how rust forms under intact-looking seasoning.
- Apply oil thinly. A teaspoon (yes, just a teaspoon) of grapeseed oil for a 10-inch pan, rubbed all over with a paper towel including the outside, the handle, and the underside. Then wipe with a clean paper towel until you cannot see any oil. The amount that remains in the iron’s pores is the right amount; visible oil is too much.
- Bake upside down on the middle rack of a 450°F oven for 1 hour. Put a foil-lined sheet pan on the rack below to catch drips. The upside-down orientation prevents oil from pooling at the bottom.
- Turn the oven off and let the pan cool inside the oven for at least 1 hour. The cool-down is when polymerization completes; pulling the pan early gives you carbon residue instead of bonded polymer.
- Repeat 1 to 4 more times depending on your starting point. One cycle for a layer fix on existing seasoning. Three to four cycles for a full strip-and-restore. The pan is done when it has a uniform matte-black surface that no longer looks “raw iron” anywhere.
How many cycles do you actually need?
This is where the standard re-season advice fails most people. The “3 to 4 cycles” number from the full seasoning pillar is the right number for an initial seasoning on bare metal. For re-seasoning, the math is different:
- Layer fix on flaky/peeling: 1 cycle (you’re putting a fresh layer on existing intact layers)
- Burn-off recovery for gummy: 1 cycle (the burn-off finished the existing oil; one fresh layer locks it in)
- Rust spot fix: 1 to 2 cycles depending on how much bare iron was exposed
- Full strip restoration: 3 to 4 cycles (you have bare iron and need to build from scratch)
The pan is finished when food releases cleanly and the surface is uniformly matte black. Two cycles is often enough for a routine restore; four is the ceiling.
What to skip
- Stripping when you don’t need to. Most pans being re-seasoned are flaky-not-fully-compromised, which means one fresh layer fixes them. Don’t burn a Saturday on a strip a layer fix would solve.
- Flaxseed oil if your pan is already flaky. Flaxseed polymerizes harder than other oils but in brittle layers; on top of existing flaky seasoning, it makes the flaking worse. Switch to grapeseed.
- Seasoning with food in the pan. Some blogs suggest cooking bacon as your “seasoning” cycle. Bacon fat is fine for cooking, but cooking it doesn’t replicate the sustained 450°F + 1 hour bake that produces durable seasoning. Cook with food in the pan as maintenance; do dedicated bakes as fixes.
- Skipping the cool-down. Pulling the pan out at 60 minutes and putting it on the stovetop interrupts polymerization. The polymer is still curing during the cool. Leave it.
- Going thicker on the oil “for better coverage.” This is the single most common mistake. Thin enough that you cannot see oil after the wipe-down. Visible oil after the wipe = the next layer will be gummy.
- Re-seasoning on a schedule. “Re-season once a month” is folklore. A pan that’s working doesn’t need to be re-seasoned. If the surface is intact and food releases, leave it alone. Seasoning is a fix for failure modes, not a maintenance ritual.
Troubleshooting: my re-season didn’t take, now what?
The new layer is gummy. Too much oil. Wipe it harder next time. To recover this layer: 500°F empty burn-off for 1 hour, then one fresh thin coat. For the full diagnosis of a tacky or gummy finish and why it happens, see why is my cast iron sticky.
The new layer flaked off within a week. The underlying seasoning was compromised but you skipped the strip. Strip to bare metal (lye cleaner or self-clean) and start over with 3-4 fresh cycles.
The pan looks splotchy after re-seasoning. Cosmetic only if food releases. The layers will even out with cooking. Don’t try to fix it.
The pan rusted after re-seasoning. Water in micro-pores under the new layer. Strip the rusted area with chainmail, re-season the affected area, and on future bakes drive off moisture on the stovetop for 90 seconds before applying oil.
The pan smokes excessively in the oven during the bake. Either the oven is hotter than the dial says (use an oven thermometer to verify) or the oil isn’t the right one (olive oil smokes heavily at 450°F because the smoke point is 375°F). Switch to grapeseed.
FAQ
How do I re-season my cast iron skillet?
Diagnose first. Splotchy needs nothing. Flaky needs one cycle of 450°F for 1 hour over the existing seasoning. Gummy needs a 500°F empty burn-off, then one cycle. Rust gets scrubbed off first, then one cycle. Only a fundamentally compromised pan needs a full strip and 3 to 4 cycles.
Do I need to strip cast iron before re-seasoning?
Usually no. Roughly 4 out of 5 pans being re-seasoned need a layer fix, not a strip. Strip only if the whole pan is flaking, gummy after burn-off, or extensively rusted.
What are the common mistakes when re-seasoning cast iron?
Stripping unnecessarily, using too much oil (the cause of most flaky and gummy seasoning), using flaxseed oil over existing flaky seasoning, seasoning with food instead of doing a dedicated bake, skipping the cool-down, and quitting after one cycle when a full restore needs 3 to 4.
How often should I re-season cast iron?
Never on a schedule. Only when the pan tells you it needs it: visible flaking, gummy surface, rust, or food sticking that didn’t used to stick. A pan in regular use with a thin oil wipe after each clean maintains its own seasoning indefinitely.
Can you re-season cast iron without an oven?
Not equivalently. Stovetop heat is uneven across the pan and rarely sustained at 450°F long enough for full polymerization. Use the oven if you have one. A grill or campfire works as a substitute if you can sustain the temperature for an hour; the stovetop alone doesn’t.
What oil is best for re-seasoning?
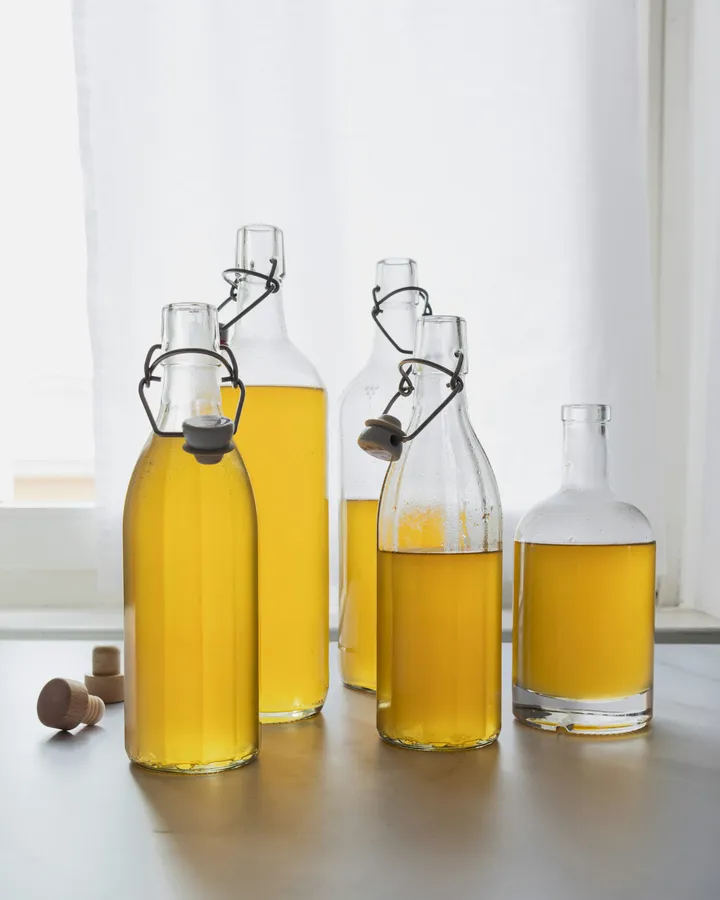
Grapeseed for the general case. Refined avocado for a more durable layer at higher cost. Canola or safflower as budget options. Skip flaxseed if your problem was flaking. Skip olive oil entirely. The full smoke-point comparison is here.
What this gets you
Once you stop treating re-seasoning as a one-size-fits-all 4-hour project and start treating it as a diagnostic with five different fixes, most “broken” cast iron pans turn out to be 90-minute jobs. The flaky pan you almost stripped just needed one fresh layer. The gummy pan that felt ruined just needed a 500°F burn-off. The same Lodge skillet that handles eggs, steak, pizza, and cornbread keeps going for another decade because you fixed the layer instead of starting over. Cast iron is repairable; that’s the point of the metal. You just have to know which repair to make.