Most articles on how to season a cast iron dutch oven treat it as the same problem as seasoning a skillet, give you the standard 450°F oven method, and call it done. That works, but it skips three Dutch-oven-specific issues that beginners get wrong: the lid (a separate piece that needs its own coating every round), the deeper interior (where oil pools and creates sticky spots), and the much higher thermal mass (which changes the cool-down time and the realistic round count per afternoon). This is the method, the Dutch-oven-specific procedural differences, and the right answer to the enameled-vs-bare question that trips up most first-time buyers.
TL;DR: the method
- Bare cast iron only. Enameled Dutch ovens (Le Creuset, Staub, Lodge Enameled) don’t need seasoning and can’t accept it. The porcelain enamel is the coating; that’s the whole point.
- Wash the pot and the lid with hot soapy water to remove factory wax. Dry on the stovetop.
- Oil every surface with a half-teaspoon of grapeseed or canola oil, including the lid top, lid underside, and both handles.
- Buff almost all the oil off with a clean cloth. The pot should look almost dry.
- Bake the pot and lid upside down at 450°F for one hour, with foil on the rack below to catch drips. Lid on a separate rack, inverted, alone.
- Cool in the oven completely (about 2 hours).
- Repeat 3-4 times for a new pot, 1 round for touch-ups on used pots.
Total active time: ~30 minutes. Total elapsed time: ~6 hours for the new-pot version, ~3 hours for a single touch-up round. The method is identical to skillet seasoning except for the lid handling.
Enameled vs bare: which Dutch ovens need seasoning
This is the most common beginner question and the most common beginner mistake. Trying to season a Le Creuset is wasted effort, and we see it on cast iron forums every week.
Bare cast iron Dutch ovens (Lodge Classic, Field, Smithey, Stargazer): interior is gray-to-black iron. These need seasoning. New ones ship pre-seasoned but the factory seasoning is thin; expect to do 3-4 additional rounds before the pot really performs.
Enameled cast iron Dutch ovens (Le Creuset, Staub, Lodge Enameled, Made In, AmazonBasics): interior is white, cream, or colored porcelain. These do not need seasoning, and seasoning oil bakes onto enamel as a sticky residue, not as a hard polymerized layer. Wash with soap and water, use, done.
If you’re not sure which you have, look at the inside of the pot. If it’s gray or black and looks like metal, it’s bare. If it’s shiny smooth and a different color than the outside, it’s enameled. We cover the buying-side decision between the two in our Dutch oven guide.
The rest of this article assumes a bare cast iron Dutch oven.
Why Dutch oven seasoning is different from skillet seasoning
The chemistry is identical to skillet seasoning, which we cover in detail in our how to season a cast iron skillet pillar: a thin layer of oil heated past its smoke point in an oxygen-rich oven polymerizes into a hard, cross-linked film bonded to the iron. The temperature (450°F), time (1 hour), oil quantity (half a teaspoon, buffed almost dry), and round count (3-4 for new pots) are the same. Lodge documents the same method for both skillets and Dutch ovens, and Serious Eats has run the chemistry independently with the same conclusion.
What changes for Dutch ovens is the procedural side, not the chemistry:
- The lid is a separate piece that needs its own coating every round. The lid is interior-side seasoning that the pot needs above the food, and exterior-side seasoning that gets the same heat-and-oil treatment as everything else. Skipping the lid means a year from now you’ll have a seasoned pot with a dull, semi-bare lid.
- The interior is deeper. A 6-quart Dutch oven has 4-5 inches of vertical sidewall. Oil pools at the bottom corners more easily than in a 2-inch-deep skillet, and pooling creates sticky drip spots when the pan is baked upside down with too much oil. Buff harder than you would for a skillet.
- The thermal mass is 2-3x a skillet. A Lodge 6-quart bare Dutch oven weighs 13 pounds; the 10.25-inch skillet weighs 5. The pot takes longer to preheat from cold (closer to 20 minutes than 10) and longer to cool in the oven (closer to 2 hours than 1). Plan an afternoon for 4 rounds, not 2 hours.
- The smoke is heavier. More oil surface area + more iron mass = noticeably more smoke during the bake. Expect aggressive smoke for 5-10 minutes of the first 15. Open windows, run the range hood on high, run the bathroom fan if you have one. The smoke is normal and harmless.
- Oven rack height matters. A 6-7 quart Dutch oven plus lid upside down on two racks won’t fit in many home ovens with the standard rack spacing. You may need to move the racks; usually one rack on the middle position with the foil-lined catch tray on the rack below works. Some kitchens need to do the pot and lid in separate rounds.
The chemistry argument from our seasoning pillar is the canonical reference for why this method works. This article is the Dutch-oven-specific how.
The method, step by step
For a new bare cast iron Dutch oven (Lodge or otherwise) out of the box, or for a stripped-and-rescued pot.
Step 1: wash the pot and lid
Use hot water and dish soap. Scrub with a chainmail or stiff brush to remove the factory wax coating on a new Lodge (a wax-based protective layer that needs to come off before the first seasoning). Pay attention to the lid; the underside especially holds factory residue.
Yes, soap is fine, even on a pan you’re about to season. The “never use soap” rule comes from the lye-soap era before 1950. We have the full treatment of the soap myth in our how to clean a cast iron skillet guide; the short version is that modern surfactant-based dish soaps don’t touch polymerized seasoning (America’s Test Kitchen says the same), and on a pre-seasoning wash you specifically want soap because you’re trying to remove factory residue.
Dry both pieces with a kitchen towel.
Step 2: dry on the stovetop
Set the pot on a burner over medium heat for 60-90 seconds (longer than a skillet because of the thermal mass). Set the lid on a second burner the same way. Listen for the sizzling sound of water evaporating; when it stops and the metal is hot to the touch, you’re done.
The stovetop dry is non-negotiable. Water trapped under the oil layer is the second most common cause of patchy seasoning after too much oil. Even what looks like a dry pot has micro-droplets in the texture, and 60 seconds of stovetop heat drives them off.
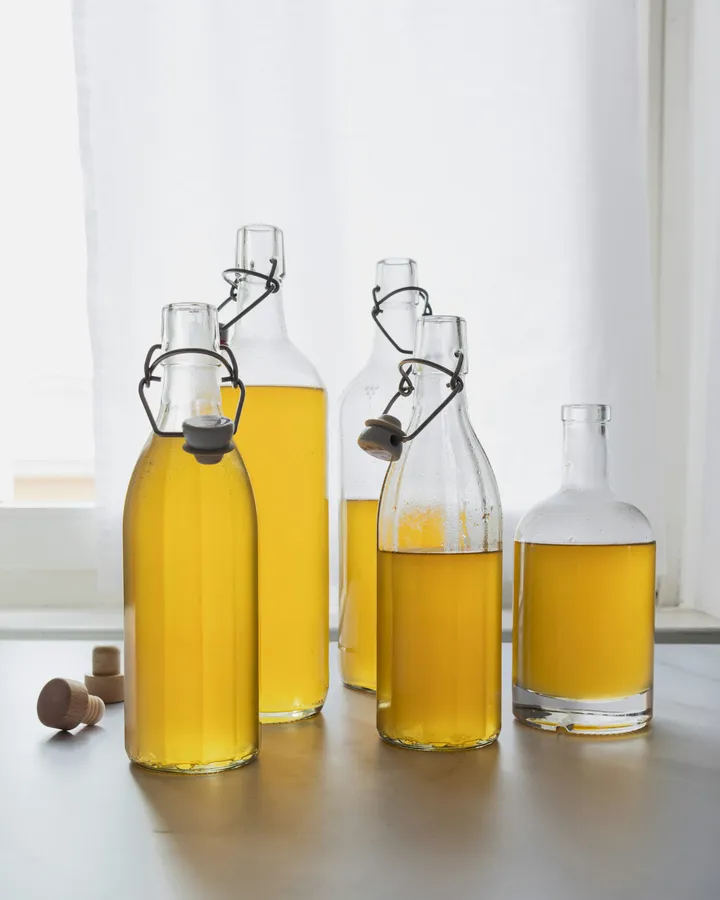
Step 3: apply oil to every surface (including the lid)
Put about half a teaspoon of grapeseed oil (or canola, or any neutral high-smoke-point oil; see our best-oil writeup) into the warm pot. Use a clean cloth or folded paper towel to spread it over every surface: interior bottom, interior sidewalls (all 4-5 inches of them), the rim, the exterior bottom, the exterior sidewalls, the handles, even the underside of the handles where they attach to the pot.
Do the same for the lid. About a quarter-teaspoon of oil is plenty for a lid. Coat the underside (which sits over the food during cooking), the top (which gets coals or thermal mass during cooking), the rim, and the handle.
Half a teaspoon for the pot is the right amount for a 6-quart. Scale up slightly for 7-9 quart pots (closer to a teaspoon), down slightly for 4-5 quart (closer to a quarter teaspoon).
Step 4: buff it almost dry
Use a separate clean cloth or fresh paper towel and wipe down the pot and lid as if you’re trying to remove the oil. Wipe until they look almost dry. You’re not removing the molecular-thin layer that’s necessary for polymerization; you’re removing the visible excess.
For Dutch ovens specifically: pay extra attention to the interior bottom corners (where the sidewall meets the floor) and the exterior bottom (which sits on the rack). Both are pooling zones. If you can see any visible oil sheen, wipe more.
The pot should look like you forgot to oil it. That’s the right amount.
Step 5: bake at 450°F for one hour
Preheat the oven to 450°F. Put a sheet of aluminum foil on the lowest rack to catch drips. Set the pot upside down on the middle rack. Set the lid alone (inverted, knob-side down) on the upper rack or on a second middle rack if your oven has dual racks at the same level. Both pieces should have clear airflow around them.
Bake for one hour. Expect heavy smoke for the first 5-10 minutes as the oil reaches its smoke point and polymerization starts. The smoke is the chemistry working. Open windows, run the range hood, run the bathroom fan. The smoke is not damaging the oven; the polymerization is harmless.
If your oven can’t fit the pot and lid simultaneously, do them in two consecutive rounds. The pot first, then the lid. Don’t season just the pot and skip the lid; the lid catches up unevenly and produces a mismatched-looking pan within months.
Step 6: cool in the oven (the long part)
When the timer goes off, turn off the oven and leave the pot and lid inside until both are fully cool. A Dutch oven’s thermal mass means this takes about 2 hours, longer than a skillet’s 1 hour.
Don’t pull a hot, freshly-seasoned Dutch oven out and put it on a cold counter. The thermal shock can crack newly-formed polymerized seasoning before it sets fully, and on a thick iron pot the temperature differential is more severe than on a skillet.
Step 7: repeat 3-4 times for a new pot
A new pot needs 3-4 full rounds. You can do all of them in an afternoon if you keep the oven on between rounds: pull both pieces out, let them cool to “warm enough to touch” (about 20 minutes), apply a fresh thin layer of oil, buff, and put them back in the still-hot oven for another hour.
By the end of round 4, the pot should be dark brown to black with a slight slight slick feel. The first cooking session will add another light layer of seasoning naturally if you cook with fat (bacon, oil-based braise, deep-fry).
Re-seasoning a used Dutch oven (light touch-up vs full reseason)
After the new-pot 4 rounds, you almost never need formal re-seasoning if you cook regularly. The cooking maintains the seasoning. Specific situations that call for it:
Touch-up (1 round): the pot has dull, dry-looking spots, or you can see small flakes of seasoning lifting in the bottom. Light flaking happens; one round of the method above rebuilds the layer. Most active Dutch oven users do this once a year, if that.
Full re-season (4 rounds): the pot has visible rust spots, has been stripped (intentionally or by aggressive scrubbing), or was stored for years and the seasoning has fully oxidized. Treat like a new pot. If there’s any rust, scrub it off first with steel wool; see our how to clean a rusty cast iron skillet for the rust-rescue workflow before you reseason.
Don’t over-season. Many beginners try to reseason their Dutch oven every few weeks “to maintain it,” which produces a thick, uneven, sometimes sticky layer that’s worse than no re-seasoning at all. If the pot is dark and the food doesn’t stick aggressively, leave it alone.
Camp Dutch oven seasoning (tripod-leg variant)
Camp Dutch ovens (Lodge Camp, Camp Chef, and others) have three short legs on the bottom and a flat lid that holds coals on top. The legs mean you can’t put a camp Dutch oven upside down on an oven rack; the legs poke up and prevent any sensible orientation.
Two workarounds:
- Put the camp Dutch oven right-side up on the middle rack with the lid alongside on a second rack or the same rack. Use less oil (a quarter-teaspoon instead of half) and buff harder, because gravity pulls oil to the bottom interior; you’ll see slightly more pooling at the floor. Acceptable for camp Dutch ovens because the floor is the part that touches coals during cooking and benefits from extra seasoning anyway.
- Season outdoors over coals, which is the traditional camp Dutch oven method. Build a hot bed of coals, set the oiled pot legs-down on the coals, put more coals on the flat lid. Cook for an hour. The seasoning happens at the same temperature range as oven seasoning but with smoke escaping outdoors, which is nice for the kitchen.
For home use of a camp Dutch oven (some people use them indoors despite the legs), the right-side-up oven method works. For actual camping, season outdoors over coals on the first trip out.
What to skip
Five recommendations that show up regularly and shouldn’t:
- Flaxseed oil. Cures fast and glossy but flakes off Dutch ovens specifically within months because Dutch ovens go through aggressive thermal cycling (braises heat and cool a 5-7 qt iron mass for hours, repeatedly). Flaxseed seasoning that lasts 6 months on a skillet lasts 2-3 months on a Dutch oven before it starts flaking in sheets. Use grapeseed or canola.
- Seasoning at 350°F. Below the smoke point of most cooking oils. Produces a tacky uncured film instead of a hard polymerized layer. Cast iron forums are full of “why is my Dutch oven sticky” posts that trace back to the 350°F mistake.
- Skipping the lid. A lid that’s been used as a cover for braises (which is what lids are for) builds up condensed-moisture spots over time. The lid needs the same seasoning rounds as the pot, every time. Even the underside.
- Lodge Seasoning Spray ($7 for 8 oz of aerosolized canola). Buy the $4 bottle of canola or grapeseed and apply with a paper towel. The spray adds nothing functional.
- Trying to season an enameled Dutch oven. Wasted oil and wasted time. Enameled cast iron doesn’t accept seasoning; the porcelain is the coating.
Frequently asked questions
Do you need to season cast iron Dutch ovens? Bare cast iron Dutch ovens: yes. Enameled (Le Creuset, Staub, Lodge Enameled): no, the porcelain enamel is the coating.
What is the best oil to season a cast iron Dutch oven? Grapeseed (smoke point 420°F) or canola (400°F). Both polymerize cleanly. Avoid flaxseed for Dutch ovens; it flakes off within months under the thermal cycling that braising produces. Full oil comparison in our best oil writeup.
How long should I season a new cast iron Dutch oven? One hour at 450°F per round, 3-4 rounds for a new pot. Total elapsed time about 6 hours including cooling between rounds. Can be done in one afternoon.
What are common cast iron seasoning mistakes? Five recurring ones: too much oil (tacky finish), 350°F instead of 450°F (under smoke point, doesn’t polymerize), skipping the lid, using flaxseed oil, over-seasoning a pot that’s fine.
How to season a cast iron Dutch oven for the first time? Wash with hot soapy water to remove factory wax. Stovetop dry. Apply a half-teaspoon of grapeseed oil to every surface including the lid. Buff almost dry. Bake pot and lid upside down at 450°F for an hour. Cool in the oven. Repeat 3-4 times.
How often should you season a cast iron Dutch oven? With regular use, almost never. The cooking maintains the seasoning. Touch up annually if you see dull or rusted spots. Full re-season only after stripping or major rust.
Related reading
This article is the Dutch-oven-specific companion to our seasoning pillar:
- How to season a cast iron skillet, the canonical method, chemistry, and troubleshooting for sticky/splotchy/smoking/peeling seasoning. Applies to Dutch ovens with the procedural differences in this article.
- Best oil for seasoning a cast iron skillet, the full smoke-point comparison table. Grapeseed is the consensus pick for Dutch ovens too.
- Cast iron Dutch oven: the complete guide (bare vs enameled), the buying-side decision and which type you actually have.
- How to clean a rusty cast iron skillet, the workflow before re-seasoning a rusted pot.
- How to clean a cast iron skillet, the daily-care routine that prevents the rust that triggers re-seasoning.
Once it’s seasoned, the recipes worth using it for: Dutch oven bread (no-knead and sourdough, where the lid traps steam for oven spring), Dutch oven pot roast (the two-temperature braising method for collagen-rich cuts), and Dutch oven beef stew (the bacon-and-tomato-paste upgrade most recipes miss). All use the same seasoned pot at opposite ends of the heat spectrum.
A properly seasoned bare cast iron Dutch oven is a 50+ year tool. The seasoning chemistry isn’t different from a skillet; the procedural shape is. Get the lid right, watch for pooling in the deep interior, plan for the longer cool times, and after four afternoon rounds you have a pot that braises, bakes bread, and deep-fries without sticking, for as long as you don’t put it in the dishwasher.