Most dutch oven pot roast recipes give you one temperature, one cooking time, and call it a day. That works, but it leaves the actual lever for tenderness on the table. This guide covers the two-temperature method (sear at 500°F, braise at 250°F) that converts collagen properly without seizing the muscle, walks through which cut to buy and why, fixes the disintegrated-vegetable problem nobody else mentions, and explains the braising chemistry so you understand why each step matters. The standard 325°F-for-three-hours version is here too, for the nights when you have less time.
Who this is for
You’re making pot roast for Sunday dinner, or a holiday, or because the weather just turned. You own a 5 or 6-quart dutch oven (cast iron or enameled, doesn’t matter). You’ve followed a recipe before and gotten a result somewhere between “fine” and “a little dry,” and you want to know what separates that from the falling-apart-tender version your grandmother made. The answer is mostly about temperature control. This guide tells you how to get it right.
TL;DR: the four rules
- Buy chuck roast, 3 to 4 pounds, for 4 to 6 people. It’s the cut with the right collagen-to-fat ratio. Skip lean cuts.
- Sear hot, braise low. Sear the dry-rubbed roast at 500°F for 4 minutes per side, then braise covered at 250°F (low) for 3.5 to 4 hours or at 325°F for 2.5 to 3 hours.
- Add vegetables late. Root vegetables (potatoes, carrots, onions) go in for the last 60 to 90 minutes, not at the start. Adding them early gives you mushy vegetables and dilutes the braising liquid.
- Don’t lift the lid for the first 2 hours. Every lid lift drops the dutch oven temperature 25 to 30°F and adds 15 minutes to the total cook. Trust the timer.
That’s the framework. The rest is the chemistry, the two methods in detail, the cut breakdown, the vegetable timing, and what to skip.
Why low and slow makes tough beef tender (collagen turns into gelatin)
Pot roast is fundamentally a chemistry problem. Chuck roast, brisket, and other braising cuts have heavy connective tissue running through the muscle, mostly collagen (the structural protein that holds animal tissue together). Collagen is tough; it’s what makes a $6/lb chuck roast chew like rubber if you grill it. Cooked at low temperature for long enough, collagen breaks down into gelatin, which is silky, mouth-coating, and the source of the rich texture of a properly braised dish.
The actual chemistry: collagen begins converting to gelatin at about 160°F and runs the conversion efficiently in the 180 to 200°F range. The conversion is slow (hours, not minutes) because collagen molecules have to physically unwind in the presence of water.
Two things can go wrong:
-
Too hot. Above about 180°F internal, the muscle fibers themselves contract and squeeze out moisture. Above 200°F they squeeze out a lot of moisture. If you braise at 350 to 375°F oven temperature, the meat hits and exceeds 200°F internal long before the collagen has finished converting. The result: tough meat that’s also dry.
-
Too cool. Below about 170°F internal, collagen converts so slowly you’d need 8 to 10 hours. Most home cooks don’t have that kind of time, and at the slow-cooker low temperatures (~190°F max) the meat steams instead of braises, the braising liquid never reduces into gravy, and the result is flat-flavored.
The sweet spot: a covered braise at 250 to 325°F oven temperature keeps the meat internal between 180 and 200°F for hours, which converts collagen to gelatin without seizing the muscle fibers. Serious Eats notes the same collagen-to-gelatin transition in their braised brisket guide, describing how connective tissue “becomes meltingly tender” as it converts during a low-and-slow cook.
The cut: chuck vs. round vs. brisket
Most articles say “chuck roast” and stop. The cuts that matter:
Chuck roast (the right answer for most pot roasts)
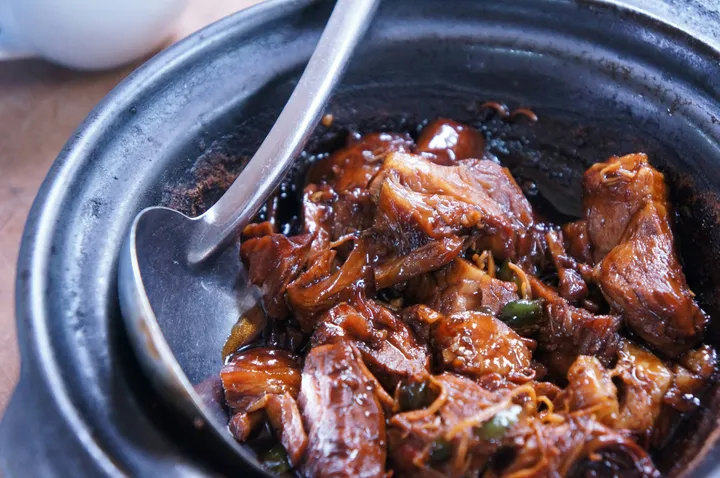
A boneless cut from the shoulder. 3 to 4 pounds, $8 to $12 per pound depending on grade. The classic pot roast cut for a reason: high marbling (intramuscular fat that bastes the meat from inside) and dense collagen (the protein that converts to gelatin). Look for chuck eye roast or chuck arm roast if you can find them, they’re the most-marbled subcuts within the chuck. A standard chuck roast labeled just “chuck roast” works fine.
Bottom round and rump roast
Leaner cuts from the rear leg. $6 to $9 per pound, more affordable. Less marbling means the meat can dry out if you don’t add enough liquid; the fix is to use a wine deglaze (which adds liquid plus flavor compounds) and braise covered with the meat fully or mostly submerged in the braising liquid. Bottom round works in a pot roast but the result is denser and less rich than chuck.
Brisket (point-cut)
The point-cut of brisket (the fattier half) makes excellent pot roast, although Americans more commonly think of brisket as a smoking cut. $12 to $18 per pound, longest cook (4 to 5 hours), most luxurious result. The “flat” of brisket is leaner and doesn’t pot-roast as well; ask the butcher for the point.
Avoid
Eye of round, sirloin tip, tenderloin, ribeye. These are tender muscles with low collagen content. They have nothing to convert during the braise. The result is dry, fibrous meat. Use those cuts for roasting and searing, not braising. The whole point of pot roast is collagen conversion.
The two-temperature dutch oven pot roast method
This is the technique nobody else on page one of Google covers. It separates the two phases of pot roast (sear and braise) into the temperatures they each need.
Step 1: Sear at high heat (500°F)
- Pull a 3 to 4-pound chuck roast from the fridge 60 minutes before cooking to bring it closer to room temperature. Cold meat from the fridge will cool the pan and prevent proper searing.
- Pat the roast completely dry with paper towels. Moisture is the enemy of a sear.
- Season generously with kosher salt (about 1 teaspoon per pound) and black pepper. Salt the surface 40 minutes ahead if you have time; the salt draws moisture out, then reabsorbs it as a brine, deepening flavor and improving the sear.
- Heat the empty dutch oven over medium-high heat for 4 to 5 minutes (no oil yet). When you can hold your hand 4 inches above the bottom and feel uncomfortable heat in under 2 seconds, the pot is ready.
- Add 2 tablespoons of neutral high-smoke-point oil (grapeseed or refined avocado; see our oil for cast iron guide for why these work). Olive oil’s smoke point (375°F) is too low for a proper sear at 500°F.
- Sear the roast undisturbed for 4 minutes per side. Don’t move it. Maillard browning needs continuous contact at high heat to form the crust. Get all 4 sides on a roughly cylindrical roast (top, bottom, and two long sides), about 16 minutes total.
- Remove the roast to a plate.
Step 2: Build the aromatic base
- Reduce the heat to medium. Add 1 large yellow onion, diced, and 4 cloves of garlic, minced. Cook 4 to 5 minutes until softened and just starting to brown.
- Optional but recommended: add 2 tablespoons of tomato paste and cook 60 seconds, stirring constantly. The paste browns and develops a deeper savory note (the same Maillard browning that develops in the sear, just on a vegetable surface).
- Add 2 to 3 fresh sprigs of thyme and 2 sprigs of rosemary (or 1 teaspoon each dried). Add 1 bay leaf.
Step 3: Deglaze and braise (250°F, 3.5 to 4 hours)
- Preheat the oven to 250°F. Yes, low.
- Pour in 1 cup of dry red wine (a Cabernet, Syrah, or any drinkable red; cooking wine is bad wine and you shouldn’t cook with bad wine). Scrape the bottom of the pot with a wooden spoon to lift up the fond (the browned bits from the sear). Let the wine reduce by half, 2 to 3 minutes.
- Add 2 cups of beef stock (low-sodium so you control the salt) and 1 tablespoon of Worcestershire sauce.
- Return the roast to the pot. The liquid should reach about halfway up the side of the meat. If your pot is bigger and the liquid is shallower than that, add another cup of stock. If the meat is fully submerged, drain off the excess; the top of the roast should not be underwater.
- Bring everything to a bare simmer on the stovetop.
- Cover with the lid and transfer to the 250°F oven. Set a timer for 2 hours and walk away. Do not open the lid during this phase.
Step 4: Add the vegetables (60 to 90 more minutes)
Adding root vegetables at the START of a pot roast (what most recipes show) gives you disintegrated potato mush after 3 hours. The fix: add them when there’s only enough cook time left to soften them properly.
- After 2 hours, briefly pull the pot from the oven. Add:
- 4 medium yellow potatoes, halved (or quartered if large)
- 4 medium carrots, peeled and cut into 2-inch chunks
- 2 additional onions, quartered (if you want extra onion in the final dish)
- Push the vegetables into the braising liquid around the meat. Cover and return to the oven.
- Cook another 60 to 90 minutes. Total time at 250°F: 3.5 to 4 hours from when the lid first went on.
Step 5: Rest and serve
- Test for doneness with a fork, not a thermometer. Stick a fork into the thickest part of the roast and twist. If the fork twists with zero resistance and the meat flakes apart, it’s done. If there’s still resistance, give it another 20 to 30 minutes covered in the oven.
- Transfer the roast and vegetables to a serving platter. Cover loosely with foil and let rest 10 to 15 minutes while you make the gravy.
- Skim visible fat off the braising liquid with a spoon (or refrigerate overnight if making ahead; the fat hardens on top and lifts off cleanly). Bring the liquid to a simmer on the stovetop and reduce by 1/3 for richer gravy, 5 to 10 minutes.
- Optional: thicken the gravy with a beurre manié (1 tablespoon soft butter mashed with 1 tablespoon flour). Whisk in slowly. Don’t use cornstarch slurries; they make gravy gummy when reheated.
The single-temperature method (when you don’t have time for the two-step)
If 4 hours is too long, this is the standard recipe-blog approach and it works well. 325°F for 3 hours total.
- Sear the roast as in Step 1 above.
- Build the aromatic base (Step 2).
- Deglaze and braise (Step 3), but use 325°F oven instead of 250°F.
- Add vegetables after 90 minutes instead of 2 hours.
- Continue cooking 60 to 90 more minutes. Total time: 2.5 to 3 hours.
The result is slightly less tender than the 250°F version (the muscle fibers seize a bit more) but still excellent. Use this when you started cooking at 2pm and need to eat at 6pm.
The vegetable timing problem (this is what most recipes get wrong)
Root vegetables (potatoes, carrots, onions) need about 60 to 90 minutes of braising to become tender. If you add them at the start of a 3-hour cook, they’re disintegrating mush by hour 2 and water-logged sponges by hour 3, leaching their flavor into the broth instead of holding their shape.
The fix is simple: add them in the last 60 to 90 minutes of cooking. The meat needs the long braise to convert collagen; the vegetables don’t.
A second optional move from restaurant kitchens: do the vegetables separately. Roast the potatoes and carrots on a sheet pan at 425°F for 30 minutes (caramelizes the edges, holds shape better), then transfer them into the pot for the last 30 minutes to soak up braising liquid without losing texture. More steps, better result.
How to make the pan gravy
The braising liquid IS your gravy. Don’t make a separate sauce.
- Skim visible fat (as in Step 5 above).
- Reduce by 1/3 on the stovetop, 5 to 10 minutes at a simmer.
- Taste. Adjust salt and pepper. If it’s flat, add a splash more Worcestershire or 1 teaspoon of red wine vinegar to brighten it.
- Thicken if desired: whisk in a beurre manié (1 tablespoon soft butter + 1 tablespoon flour, mashed together) bit by bit until you reach the consistency you want. Or skip thickening and serve as au jus.
- Strain through a mesh sieve if you want a smoother gravy. Or leave the cooked onions in for rustic texture (recommended).
The best dutch oven for pot roast
A 5 to 6-quart round dutch oven is the right size for a 3 to 4-pound roast. Smaller and the meat crowds the pot (no Maillard during the sear). Larger and the braising liquid spreads too thin to reach the right depth on the meat.
Budget pick: Lodge 6-Quart Enameled Dutch Oven (~$80). Pre-coated enamel makes deglazing and cleanup easier than bare cast iron. Rated to 500°F so it handles the sear-then-braise method. Sits at one-quarter the price of the splurge picks while cooking essentially identically. Pairs with our broader Dutch oven complete guide.
Mid pick: Lodge 6-Quart Chef Collection Double Dutch Oven (~$60). Bare cast iron with a thinner, smoother machined finish than the standard Lodge dutch oven. No enamel to worry about. Requires a seasoned interior but otherwise braises identically to the enameled version. The slight con is that acidic deglazes (wine, tomato paste) can dull the seasoning over time; you’ll need to touch up the seasoning every 10 to 20 long braises.
Splurge pick: Le Creuset 5.5-Quart Round Dutch Oven (~$400). The gold standard. The enamel quality, lid fit, and heat retention are noticeably better than any sub-$200 option. Lifetime warranty. Cooks pot roast identically to the $60 Lodge; you’re paying for the finish and the brand.
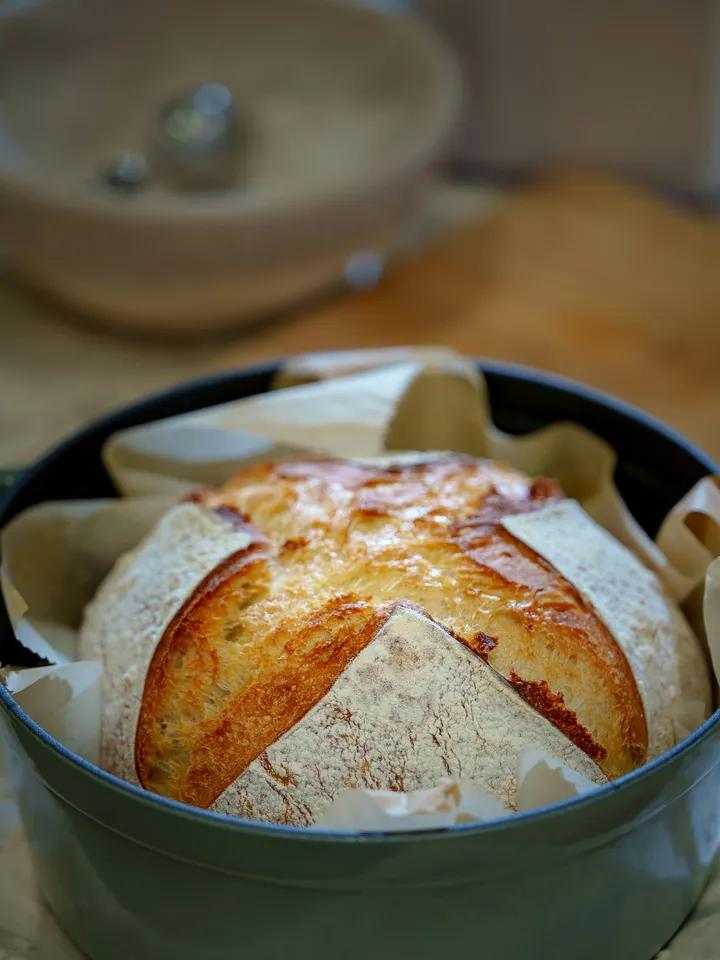
For pot roast specifically, the 6-quart sizes are ideal. If you also bake bread (see our Dutch oven bread guide) the 5-quart sizes work for that too, but for pot roast they crowd the meat. Go 6-quart if you can pick only one.
Troubleshooting
The meat is tough after 3 hours. Either the temperature was too high (the muscle seized) or the meat wasn’t done yet (collagen still converting). Test with a fork. If there’s resistance, drop the oven to 275°F and give it another 30 to 60 minutes.
The vegetables are mush. Added too early. Next time, add them in the last 60 to 90 minutes.
The braising liquid is too thin. Reduce it on the stovetop after the meat comes out. 5 to 10 minutes at a simmer concentrates the flavor significantly.
The meat fell apart when I tried to slice it. That’s a feature, not a bug. Pot roast is supposed to fall apart. Cut it into chunks with two forks or a serving spoon rather than trying to slice clean portions.
The flavor is flat. Three likely causes: (1) you didn’t sear the meat hard enough (a barely-browned sear gives barely-browned flavor), (2) you skipped the tomato paste (that brown-the-paste step adds depth), or (3) you used a wine you wouldn’t drink (cooking wine is bad wine and gives bad braises). Fix one variable next time.
The fat layer is gross. Refrigerate the entire pot overnight. The fat hardens into a solid disc on top and lifts off in one piece. Reheat gently. Makes pot roast a great make-ahead dish.
What to skip
- Cooking wine. It’s bad wine with salt added as a “preservative.” Use a $10 bottle of drinkable Cabernet or Syrah, or skip the wine entirely and use 1 cup more beef stock plus 1 tablespoon of red wine vinegar to mimic the acid.
- Lifting the lid during the first 2 hours. Every peek drops the dutch oven temperature 25 to 30°F. The pot has to climb back to braising temperature, which adds 15 minutes per peek. Trust the timer.
- Skimming fat while it’s hot. It’s hard, messy, and you only get half of it. Refrigerate overnight; the fat sets into a solid disc you can remove in one piece.
- Cornstarch slurries for thickening gravy. Cornstarch works on a stovetop and breaks down badly when reheated, leaving gummy texture in leftover gravy. Use a flour-and-butter beurre manié instead; it’s stable.
- Adding salt at the END. Salt 40 minutes before the sear, again in the aromatic base, and adjust at the end. Single end-of-cook salting gives you surface-salty meat with bland interior.
- Eye of round or sirloin tip. Lean cuts have no collagen. They dry out during the braise. Spend the extra $4 for chuck.
- Cooking pot roast in a 4-quart dutch oven. Too tight; the meat doesn’t sear evenly and the braising liquid spreads too thin. 5 to 6-quart is the right size.
- Making the gravy as a separate sauce. The braising liquid IS the gravy. Reduce it and skip the second pan.
FAQ
How long does it take to cook a pot roast in a Dutch oven?
3 to 4 hours total for a 3 to 4-pound roast. Sear at high heat for 4 minutes per side, then braise covered at 250°F for 3.5 to 4 hours (two-temperature method) or 325°F for 2.5 to 3 hours (single-temperature). The roast is done when a fork twists in the meat with zero resistance.
What temperature should I cook a Dutch oven pot roast?
The two-temperature method: sear at 500°F on the stovetop, braise at 250°F in the oven. The single-temperature method: 325°F covered in the oven. Lower than 250°F is too slow for home cooks (8+ hours); higher than 350°F seizes the muscle before collagen converts.
Is it better to cook a pot roast in a Dutch oven or a crock pot?
Dutch oven for the better result, crock pot for the easier weekday. The dutch oven lets you sear and reduce gravy properly. The crock pot is hands-off but the meat steams instead of braises and the result is consistently flatter in flavor. The crock pot wins on convenience; the dutch oven wins on quality.
What is the best cut of meat for pot roast?
Chuck roast, $8 to $12 per pound. High marbling, high collagen content, ideal for a 3 to 4 hour braise. Bottom round is a cheaper alternative ($6 to $9/lb); brisket point-cut is a premium alternative ($12 to $18/lb). Avoid lean cuts like eye of round, sirloin tip, or ribeye; they dry out during braising.
Why is my pot roast tough?
Three causes, most to least common: cooked too hot (seized the muscle), undercooked (collagen not yet converted), or used a lean cut (no collagen to convert). Drop the oven to 275°F, check doneness with a fork twist, and use chuck. Fixing any one of those usually solves it.
Can I make pot roast without searing?
Yes, but you lose meaningful flavor. The sear creates Maillard browning at 300°F-plus surface temperature, which generates flavor compounds the braise itself can’t produce. If you must skip the stovetop sear, broil the meat for 4 minutes per side instead. Don’t skip the browning entirely.
What this gets you
The dutch oven pot roast you make on the next Sunday will be better than anything you’ve made before, and once you make the two-temperature version, the standard-recipe single-temperature version starts to feel like a compromise. The same dutch oven that bakes crusty bread, simmers the beef stew version of this same cut, and the same cast iron principles that drive the perfect steak make this dish work. One pot, one cut of meat, one Sunday afternoon. Don’t crowd the pot, don’t lift the lid, don’t add the vegetables too early. That’s the whole game.