Polishing a cast iron skillet is the rare cast iron project where the most popular version of the advice will actively ruin your pan. The keyword people search is “mirror polish,” the videos show a buffing wheel and a shine you can see your face in, and the result is a great-looking pan that will not hold seasoning and is not safe to cook on. There is a real, useful version of polishing a cast iron skillet: sanding off the rough factory texture down to a moderately smooth surface that releases food better and still takes seasoning. This guide is about that version, exactly where to stop, and the one safety step almost nobody mentions.
Who this is for
You bought a new Lodge, ran your hand across the cooking surface, and felt sandpaper. You’ve seen people online grind their pans glassy-smooth and wondered if you should. Or you tried it, took the surface to a high grit or a mirror shine, and watched the seasoning flake off after one cook. This guide explains the two completely different things people call “polishing,” why one of them works and the other one fails, the grit range that actually holds seasoning, and how to do the job without breathing iron dust. It also gives you the honest answer to whether you should bother at all.
TL;DR: the five rules
- Sand, don’t mirror-buff. Smoothing the rough casting texture is useful. Buffing to a mirror finish with polishing compound is not: the seasoning won’t grip it and the compound isn’t food-safe.
- Stop at a medium grit. Knock the peaks down with 40 to 60 grit, finish around 120 to 220, and stop. Too smooth is a real failure mode, not a bonus.
- Wear a respirator. Sanding cast iron throws fine iron dust plus the ground-off seasoning. A P100 or N95, eye protection, and outdoor airflow are non-negotiable.
- Clean out every speck of metal dust before any oil touches the pan.
- Re-season immediately. You’ve removed all the seasoning down to bare iron, and bare iron flash-rusts within hours.
That’s the whole job. Below is why each rule holds, the step by step, and whether this is worth an afternoon of your time.
”Polishing” is two different jobs (and one of them ruins the pan for cooking)
The word “polishing” hides two procedures that end in very different places, and conflating them is why so many people wreck a good pan.
Job one: sanding the surface smoother. You take the rough, pebbly sand-cast texture of a modern pan and sand it down to something closer to the satin-smooth feel of a vintage skillet. The surface still has fine tooth to it. This helps food release a little and still holds seasoning. This is the version worth doing.
Job two: mirror-polishing. You keep going, through high grits and often a buffing wheel with polishing compound, until the iron shines like chrome. This looks spectacular and is the version the “mirror polish cast iron” videos show. It is also the version that fails as cookware. Two reasons, and both come straight from the people who have tried it.
First, the seasoning won’t stick. As one cook put it on a tool-makers’ forum after a failed attempt, polishing “folds the micrograin structure over the pores that the seasoning enters to give a footing.” Once the surface is buffed glass-smooth, the polymerized oil that forms seasoning has nothing to grip. Second, a true mirror finish is achieved with polishing compound, which is not food-safe. As another commenter on the same thread said about a mirror-buffed pan, “I wouldn’t cook with it after that.” A mirror pan is a display piece.
So when this guide says “polish,” it means job one. The whole skill is knowing where job one ends and job two begins.
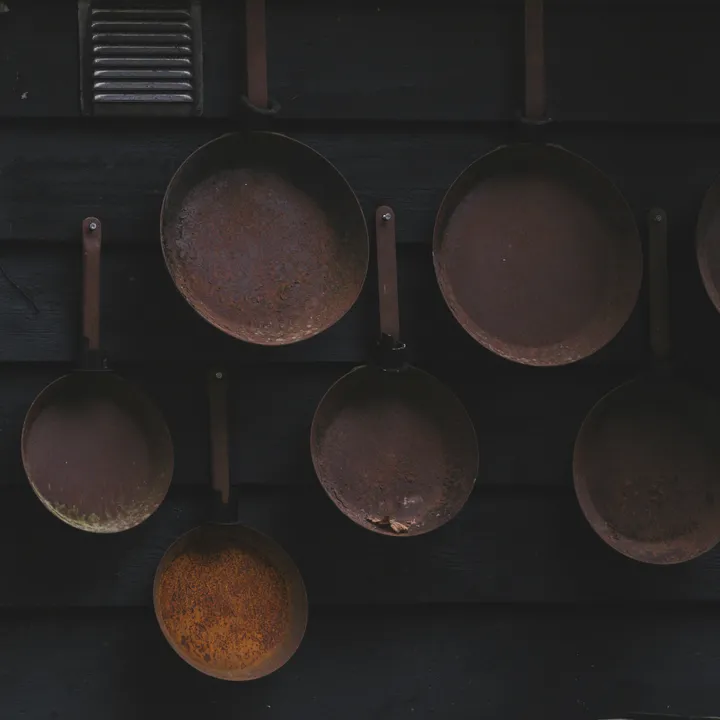
Why modern pans are rough and vintage pans are smooth
Run your hand across a 1930s Griswold and then a new Lodge and the difference is obvious. The Griswold feels like polished stone; the Lodge feels like fine sandpaper. That difference is a manufacturing decision, not a quality one.
Pre-1960s American cast iron was sand-cast, the same basic process used today, but then machined smooth on the cooking surface as a finishing step. Mid-century cost pressure killed that step at most foundries, including Lodge, which now ships pans with the raw sand-cast texture you feel straight from the box. We cover the full history, makers, and what vintage smoothness is actually worth in the vintage cast iron guide. The short version: a 10-inch Griswold weighs about 4 pounds against a modern 10.25-inch Lodge’s 5.5, because the old pans were also machined thinner, and the cooking surface was ground glassy as part of the same finishing work.
This matters for polishing because it tells you the target. You are not trying to invent something new. You are doing by hand what the foundry used to do at the factory: take a sand-cast surface and smooth it. And the old pans, for all their reputation, were never mirror-buffed. They were machined to a satin smoothness that still held seasoning beautifully. That is your stopping point, not a chrome shine.
It also tells you that rough is not broken. Lodge seasons every pan at the foundry, and the company describes its seasoning as “a layer of carbonized oil” baked on with vegetable oil, a finish that gets better with use. A rough pan that’s properly seasoned cooks just fine. Polishing is an optional upgrade, not a repair.
How smooth is too smooth: the grit that holds seasoning
Here is the single most important number in this whole project, and it runs against instinct: you stop sanding well before the surface gets as smooth as it could.
The reason is the same micro-texture point from earlier, stated as a working rule. Seasoning grips the iron partly through the fine tooth of the surface. Sand to a medium grit and you keep enough tooth for the seasoning to bond. Sand or buff past that and you start smearing the surface closed, and the seasoning flakes off in use.
This isn’t theoretical. The most-shared version of this mistake comes from a cook who sanded a 12-inch Lodge all the way to 1000 grit, seasoned it six times with flax oil, and reported back: “as it turns out I lost most of the seasoning after the first real cook in it.” The community answer was unanimous: he went too fine. The repeated advice was to stop coarse, in the 40 to 120 range, with one veteran noting his own Lodge sanded to 40 or 60 grit “loooooves seasoning and it’s super smooth. Remember, vintage cast iron wasn’t completely smooth.”
So the working range most people land on:
- 40 to 60 grit to knock down the casting peaks and do the real material removal.
- 80 then 120 grit to refine the surface into something that feels smooth to the hand.
- Stop around 120, up to 220 at the most. This is plenty smooth for cooking and still holds seasoning.
- Past 220, and especially a buffing wheel, is the danger zone. That’s where you cross from job one into job two.
There’s a tradeoff to understand rather than a single perfect number. Stopping coarser (around 60) builds seasoning faster and more reliably but leaves a touch more texture. Going to 120 to 220 feels slicker but is slower to season in and less forgiving if you overshoot. None of these will fail you. The failure is at the mirror end, not the medium end. If you’re unsure, stop sooner: a 60-grit Lodge that seasons easily beats a 600-grit Lodge whose seasoning won’t stay on.
How to polish a cast iron skillet, step by step
What you need
- A power sander. Three honest options, fastest to slowest: an angle grinder with a flap disc (aggressive, removes material quickly, easiest to gouge if you’re heavy-handed), a random orbital sander (slower, very controlled, ideal for the flat cooking floor), or a drill fitted with a sanding disc or flap wheel (the accessible middle ground). Hand sanding works too and is the safest, but expect 2 to 3 hours of real effort.
- Sandpaper or discs in 40, 60, 80, and 120 grit. Add 220 only if you want to go a little smoother.
- A respirator (P100 or at minimum N95), safety glasses, and gloves.
- A way to hold the pan still: a bench vise with padded jaws, or clamped to a sturdy workbench.
- Oil for re-seasoning (we explain why grapeseed below) and a clean lint-free cloth.
Safety first (the part every guide skips)
Sanding cast iron throws two things into the air: fine iron particles from the pan itself and the ground-off factory seasoning, which is carbonized oil. You do not want either in your lungs. Not one of the popular how-to results addresses this, and it’s the most important instruction in this guide.
Wear a proper respirator, not a paper dust mask: a P100 cartridge respirator is ideal, an N95 is the floor. Add wraparound eye protection, because flap discs fling grit. Work outdoors or in a garage with the door open and a fan moving air away from you, never in a closed kitchen. Iron dust also settles on every surface nearby, so clear the area and plan to sweep up after. If you’re using an angle grinder, keep both hands on the tool and the pan locked down; these remove metal fast and can skip across a curved surface.
Step 1: strip the factory seasoning to bare iron
You’re about to sand the surface anyway, so the coarse grit will take the seasoning off as it goes. But starting from bare metal makes the sanding cleaner and lets you see the actual iron surface you’re shaping. If the pan is heavily seasoned or you’d rather strip chemically first, our re-seasoning guide covers the strip-to-bare methods. Either way, the goal at the end of this step is gray, bare iron on the cooking surface.
Step 2: knock down the casting peaks (coarse grit)
Start with 40 or 60 grit. Work the flat cooking floor of the pan first, since that’s the surface that touches food and matters most. Keep the sander moving in overlapping passes; don’t dwell in one spot, which digs a low spot. The pebbly high points come down quickly, and you’ll see the surface change from bumpy to uniformly matte. The curved walls are harder to reach and matter far less, so don’t obsess over them. This coarse stage does the real work; expect it to take the longest.
Step 3: smooth to the stop point, not to a mirror
Step up to 80, then 120 grit, repeating the overlapping passes at each grit until the previous grit’s scratches are gone. Run your bare hand (or a clean cloth) across the cooling surface: when it feels smooth and even, like a vintage pan rather than a chrome bumper, you’re done. That’s around 120, up to 220 if you want a touch slicker. Do not reach for a buffing wheel or polishing compound. The moment you’re chasing shine instead of smoothness, you’ve crossed into the version that won’t hold seasoning. Smooth and matte is the target. Reflective is the mistake.
Step 4: clean out every speck of metal dust
This step protects both your food and your seasoning. Wash the pan with hot, soapy water and a scrub pad, working out all the fine metal particles lodged in the surface. Rinse, then wipe with a clean paper towel: if it comes away gray, keep washing. Repeat until a paper towel wipes clean. Any iron dust left behind will end up in your first meal and will interfere with an even seasoning layer. Dry the pan completely, then set it on a burner on low for a minute or two to drive off the last of the moisture, because bare iron is already starting to rust the moment it’s wet.
Step 5: re-season immediately
Bare polished iron has no protection and will flash-rust within hours, so move straight into seasoning. Rub a very thin layer of oil over the entire pan and then buff it back off until the pan looks dry, which is the single most common seasoning mistake to avoid. Bake it upside down at 450°F for an hour, let it cool, and repeat for several thin layers. We use grapeseed for its 420°F smoke point and clean polymerization, and the oil guide explains why it beats flax (the oil the 1000-grit cautionary tale used, which is prone to flaking). The full method, including the why behind the temperature, is in the seasoning guide. Do not skip this or stop at one coat: a freshly polished pan needs its seasoning rebuilt from zero before it’s ready to cook.
Is polishing a cast iron skillet worth it?
Straight answer: for most people, no. For some people, genuinely yes.
The case against it is the same point we make in the eggs guide and the sticky-pan guide: release is governed far more by heat control and adequate seasoning than by surface smoothness. If your eggs stick, the cause is almost always a pan that’s the wrong temperature, not a surface that’s too rough. Polishing a pan to fix sticking is solving the wrong problem, and you’ll be disappointed when the smooth pan still sticks because the heat was never right. Polishing also voids the factory pre-seasoning, ties up an afternoon, and requires power tools and a safe place to make a mess.
The case for it is narrow but real. If you cook eggs or crepes daily, you’ll notice a genuinely smoother release on a polished surface, the same small edge vintage pans have. If you like the idea of a vintage-style slick surface but don’t want to pay $150 to $300 for a restored Griswold, sanding a $30 Lodge Classic skillet is the cheap way to approximate it. And some people simply enjoy the project. Those are all fine reasons.
There’s also a third path: buy a pan that’s already machined smooth. Stargazer, Smithey, and Field grind their cooking surfaces at the factory, so you get vintage-style smoothness with modern availability and no sanding. They cost more, and the buying guide lays out where each lands on price and finish. If your whole goal is a smooth pan and you don’t want to do the work, buying one already smooth is the saner move than turning your kitchen into a metal shop.
What to skip (the mistakes that waste an afternoon)
- The mirror finish. It’s the version the keyword implies and the version that fails. A buffed, reflective surface won’t hold seasoning, and the polishing compound that creates it isn’t food-safe. Stop at smooth and matte.
- Going past 220 grit on a cooking pan. Higher grit feels like “better,” but it’s where seasoning adhesion falls off. The 1000-grit pan that lost its seasoning after one cook is the cautionary example.
- Skipping the respirator. Iron dust and ground-off seasoning are not things to breathe. A paper dust mask isn’t enough; use a P100 or N95.
- Cooking before you’ve cleaned out the metal dust. Fine iron particles will end up in your food and wreck the first seasoning layer. Wipe until a paper towel comes away clean.
- Skipping the re-season, or doing one coat. Bare polished iron flash-rusts fast and has zero nonstick. Rebuild several thin layers immediately.
- Polishing to fix sticking. If the real problem is heat control, a smoother pan won’t save you. Diagnose the sticking first.
Frequently asked questions
Should you polish a cast iron skillet?
Only the right kind. Sanding off the rough sand-cast texture to a moderately smooth surface helps release and still holds seasoning. Buffing to a mirror finish does not: that surface is too slick to grip seasoning, and the compound used for a mirror shine isn’t food-safe. If you sand, stop at a medium grit and re-season right away. If you want a shiny showpiece, that pan is for display, not cooking.
What grit should you sand a cast iron skillet to?
Start coarse, 40 to 60 grit, to knock down the casting peaks, then step up through 80 and 120 and stop around 120 to 220. That’s noticeably smoother and still seasons well. Going past 220, and especially buffing to a mirror, is where the seasoning stops sticking: one well-known attempt sanded to 1000 grit and the seasoning flaked off after the first cook.
Will seasoning still stick to a polished cast iron pan?
Yes, unless you over-polish. Seasoning is polymerized oil that grips the iron partly through the surface’s fine texture, so a moderately smooth, sanded surface seasons fine. Only at the extreme, a buffed mirror finish, do cooks consistently report seasoning that won’t adhere, because buffing smears the micro-texture closed. Stop at a medium grit and the seasoning has plenty to hold. Vintage pans were smooth but never mirror-buffed.
Is polishing a cast iron skillet worth it?
For most cooks, no, because heat control and adequate seasoning matter more than smoothness for release. It’s worth it if you cook eggs daily, want a vintage-style slick surface, and would rather spend an afternoon and $30 than $200 on a machined-smooth pan. It is not a fix for sticking, which is almost always a heat problem, and it removes the factory pre-seasoning and takes 2 to 3 hours plus power tools.
When did cast iron stop being polished?
Around the mid-twentieth century. Pre-1960s American pans (Griswold, Wagner, and others) were sand-cast and then machined smooth as a finishing step. Cost pressure ended that step at most foundries, including Lodge, which is why modern pans ship with the rough sand-cast texture. The pans aren’t worse, they just skip the grinding that left a glassy surface, and they season and cook well as they come.
How do you polish a cast iron skillet?
Strip the seasoning to bare iron, then sand the cooking surface with an orbital sander, a drill with a sanding disc, or an angle grinder with a flap disc, starting at 40 to 60 grit and stepping up to about 120 to 220. Wear a P100 or N95 respirator and eye protection and work outdoors, because sanding throws fine iron dust. Clean every speck of metal dust out, then re-season immediately, since bare iron flash-rusts within hours.
Is Dawn dish soap safe for cast iron?
Yes. A little dish soap on a seasoned pan is fine and won’t strip the polymerized seasoning, which is bonded to the metal rather than sitting on top like grease. The no-soap rule is a holdover from old lye-based soaps. After polishing and re-seasoning, wash normally; the full routine is in our cleaning guide. The only real caution is scrubbing a brand-new pan hard enough to wear through its thin starter seasoning.
Related reading
Polishing only makes sense alongside the seasoning that follows it, so start with the seasoning method and the best oil to use, since a freshly sanded pan has to be seasoned from bare iron. If your real complaint is that food sticks, read why cast iron gets sticky and the eggs guide before you reach for a sander, because the fix is usually heat, not grit. For the history of why old pans were smooth and what that smoothness is worth, the vintage cast iron guide has the makers and prices, and if you’d rather buy smooth than sand it yourself, the buying guide covers the machined-surface pans.
Polishing a cast iron skillet is one of those projects where the internet’s loudest version (the mirror shine) is the wrong one, and the quiet, correct version (a medium-grit satin smoothness that still seasons) is the one that actually improves your cooking. Stop before the shine, wear the respirator, clean out the dust, and rebuild the seasoning, and you’ll have a pan that does by hand what the old foundries used to do at the factory. Skip any of those four and you’ll have a beautiful paperweight.